Set a custom domain for your blog with BlueHost
A custom domain gives you a much more personal touch when it comes to publishing your blog. If you have an existing website, and want to use a subdomain to point at your Blogger blog, here's how to set one up if you're using BlueHost - though the same concepts apply to all domain vendors.
Click '+ Set up a third-party URL for your blog'. Enter your custom domain, including the subdomain that you want to use. Currently, Blogger requires you to use a subdomain, with the option of redirecting the naked domain to that subdomain. Here's some examples to clarify what naked domains, domains, and subdomains mean. Say you own example.com as your domain.
Top Level Domain: .com
Naked domain (no subdomain): example.com
Subdomain 'blog': blog.example.com
If you then choose to redirect your naked domain to your blog's subdomain, visiting example.com would result in a redirect to blog.example.com.

If you click 'Save', the setup will fail, with instructions on the verification process.
Note: If you've verified ownership of the domain on another one of your blogs, you won't need to verify a second time. You will, however, need to use a different subdomain. blog2? another-blog?


Add your custom domain to your blog
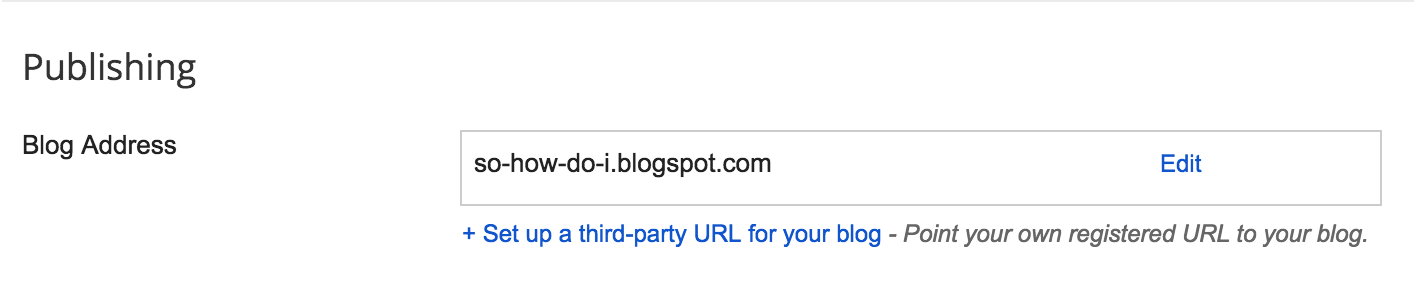
Navigate to Settings => Basic.
The setting for adding your custom domain.
Click '+ Set up a third-party URL for your blog'. Enter your custom domain, including the subdomain that you want to use. Currently, Blogger requires you to use a subdomain, with the option of redirecting the naked domain to that subdomain. Here's some examples to clarify what naked domains, domains, and subdomains mean. Say you own example.com as your domain.
Top Level Domain: .com
Naked domain (no subdomain): example.com
Subdomain 'blog': blog.example.com
If you then choose to redirect your naked domain to your blog's subdomain, visiting example.com would result in a redirect to blog.example.com.
An example, using subdomain 'blog' on domain 'example.com'
Note: If you've verified ownership of the domain on another one of your blogs, you won't need to verify a second time. You will, however, need to use a different subdomain. blog2? another-blog?
Verifying your domain
After you've attempted to save, if this is the first Blog that you're setting up for the domain, you'll get an error that your domain has not been verified.
CNAME entries that you need to add to your domain's zone records.
Now, you just need to head over to your domain registrar's settings. This example is for bluehost.com, but the same concept applies for all domain vendors - you need to add two CNAME entries.
- A CNAME for the subdomain you want to use (in this example, 'blog') which points to google's nameservers, which will then have a record that your subdomain points to your blog.
- A CNAME with a magic code, so that Google can verify that you actually own the domain. This is a security feature to prevent domain hijacking!
The zone settings on BlueHost are found under Domains => Zone Editor.
1. A CNAME for your subdomain, pointing to ghs.google.com
2. A CNAME which verifies you own the domain, as per the instructions from Blogger.
It can take a while for your DNS changes to propagate, but once they're out, Google's servers will have verified that you do, in fact, own your domain, and you will be able to save blog.example.com as the custom domain for your blog!
Happy Blogging.


I love your blog and i think i will switch to blue host
ReplyDelete