Posts

Showing posts with the label Templates

Add snippets to the Emporio theme
Image
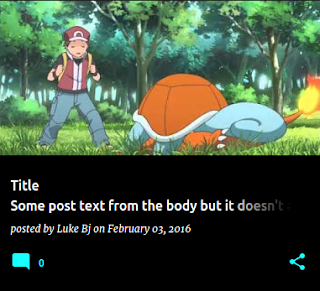
A lot of people love the image-focused look of the newer Emporio template. This article explains how to tweak your template's XML to add a short snippet to the Emporio posts - unfortunately, there's no easy way to add in snippets for Emporio, without customizing the markup. But, if you're feeling brave, head to: Theme -> Edit HTML -> Jump to Widget -> Blog 1 If you search for 'snippet-container', you'll come across: <div class='snippet-container r-snippet-container'> <div class='r-snippetized'> <data:post.title /> </div> <b:if cond='data:post.title != ""'> <div class='snippet-fade r-snippet-fade hidden'></div> </b:if> </div> Notice that it's just got the title. You could change it to add something like: <div class='snippet-container r-snippet-container'> <div class='r-snippetized'> <data:post....

Remove the header image for posts in Emporio

The new Emporio template features a large, blurred-out copy of the featured image for a post as the header image. Some like this feature, some don't - here's how to remove it if you're not a fan! Head to Theme => Edit HTML Search for ' data:view.isSingleItem ' The code that you see should look something like this:  <b:if cond='data:view.isSingleItem'> <b:if cond='data:widgets.Blog.first.posts.first.featuredImage'> <b:include data='{ image: data:widgets.Blog.first.posts.first.featuredImage, selector: &quot;.bg-photo&quot; }' name='responsiveImageStyle'/> <div class='bg-photo-container'> <div class='bg-photo'/> </div> </b:if> </b:if> Delete the XML including the <b:if> tag code. Happy Emporio'ing!

Add Whatsapp sharing to the new templates

Blogger's sharing options include Facebook, Twitter, and Pinterest - some of the more popular platforms - but Whatsapp is missing from the list. This article describes how you can customize the markup of your Blog gadget, to include Whatsapp in the sharing buttons list to include Whatsapp. Note: Though the concepts in this article are re-usable elsewhere, it is written assuming that you are using one of the new Themes - Contempo, Soho, Emporio or Notable. For Dynamic views, visit the  Dynamic views whatsapp instructions . Head to Theme => Edit HTML , and use the Jump to gadget  helper to jump to Blog1 . Update the sharingButtonsMenu includable The sharing buttons for a post are defined in the sharingButtonsMenu  includable, which is called as part of the stack from the postShareButtons includable, which can be toggled on and off in the Blog Posts settings (under the 'Share Buttons' byline). To add Whatsapp in the mix, we want an extra line item ( <li...

Offset the HTML anchor to adjust for the sticky header

In the new Blogger templates, they heavily feature a sticky header , or a fixed header, which follows you down the page once you're past the title page. This header can get in the way when linking to anchors (fragments) in your pages, since the browser will use the anchor's position in the page when it jumps down to the content. To counter this issue, we can add a little negative-margin, positive padding CSS hack to the : target anchor. Example header If you click the get link icon (the icon) above, you'll see how it jumps a little above the header. *:target:before { display: block; content: " "; height: 65px; margin-top: -65px; visibility: hidden; } To apply this style to your blog, head to: blogger.com  => (Your blog) => Theme => Customize => Advanced => Add CSS and add it to the text area, and save. Happy anchoring!

Add custom Google Analytics event tracking

Image
In an  earlier post , I covered the correct way of adding Google Analytics to your blog without ending up with a 'custom' template. With some blogs, there might be user interactions that you want to track. For example, in so-how-do-i.blogspot.com, some articles like  parallax for Contempo  or  AddThis sharing icons  have a custom HTML gadget that users can one-click install on their blogs. So, I wanted to track how often that is happening. Note: Blogger uses 'blogger' as the namespace for their analytics - ensure that you use 'blogger.send' , rather than the default 'send' when logging. Custom events in Universal Analytics Blogger's Google Analytics snippet uses the analytics.js  Universal Analytics snippet. Their  event tracking documentation  does a great job of covering the basics for tracking an event on the client. ga('blogger.send', 'event', [eventCategory], [eventAction], [eventLabel], [eventValue], [fieldsObjec...

Create a JS-based custom template from scratch

Blogger's templating language is a bit clunky, and as a result there are many template authors out there who are using JS-based solutions to develop custom templates. But, even when you're inspired to do so, it's hard to know where to get started. This article covers creating a very basic custom template, with a few customizable skin settings, based on the  Mustache JS  templating language. To see the sad-looking output that this creates, you can  view the demo . An empty shell First things first, we need to start from a template that is very, very empty, but passes the minimum validation requirements that Blogger has. The below snippet is an example of a very empty starting-point. The main chunk of data that we need in order to produce the posts to be shown for any given view is all found in the Blog Posts gadget. <?xml version="1.0" encoding="UTF-8" ?> <!DOCTYPE html> <html b:css='false' b:defaultwidgetversi...

Add quickedit icons to the new themes in Chrome

The new themes that Blogger recently launched (Contempo, Soho, Emporio and Notable) don't currently support the quickedit icons that administrators used to be able to see on their blogspot page. Several users were asking how to get these back, so I've hacked together a little chrome extension to allow users to add the icons for a user-specified set of URLs. The chrome extension can be found  in the chrome webstore . Setting up the extension Once installed, it's pretty straightforward to enable it for your blogs. Simply click the icon, enter the domains (one per line). NOTE: The string comparison is for window.location.hostname only, which mean you don't want to include the scheme (e.g.  http://). My configuration, for example, is so-how-do-i.blogspot.com.au template-data.blogspot.com.au Hope this helps for you users that love the 2-way navigation. Happy editing!

Add a parallax effect to Soho

Blogger's just launched a bunch of new templates. I put up some instructions for  adding a parallax effect to Contempo  - this article is the exact same effect, but for Soho! If you scroll a little on this blog, you'll notice that I've got a subtle parallax effect going. That effect is just a small JS library by Mark Dalgleish , called Stellar. To add the same parallax effect to your Soho template, just click this button! The content is shown below. Alternatively, you can simply head to your blog's Layout  tab, and add an HTML/Javascript gadget anywhere in the page. Then, add the following content to it: <script src="https://ajax.googleapis.com/ajax/libs/jquery/1.11.0/jquery.min.js"></script> <script src='https://cdn.rawgit.com/markdalgleish/stellar.js/master/jquery.stellar.min.js'></script> <script> $('.hero-image').attr('data-stellar-background-ratio', '0.5'); $(window).stellar(...

Change my post timestamps to a custom format

Blogger offers some built-in options for a post timestamp, but if you want to use a format that is custom, you can do so by overriding the postTimestamp   in your template's Blog widget. Head to blogger.com => (Your blog) => Theme => Edit HTML Hit 'Jump to Gadget', select Blog. Inside the <b:widget> tag, add the following snippet. Replace "MMM dd" with the desired format <b:includable id='postTimestamp'> <span class='byline post-timestamp'> <data:byline.label /> <b:if cond='data:post.url'> <meta expr:content='data:post.url.canonical' /> <a class='timestamp-link' expr:href='data:post.url' rel='bookmark' title='permanent link'> <time class='published' expr:datetime='data:post.date.iso8601' expr:title='data:post.date.iso8601'> <b:eval expr='data:post.date format "...

Add a background image to Emporio

Emporio currently doesn't have support for a background image, though it does have a background image variable. Very similar to the instructions for  making the Simple theme's background responsive , the following gadget will change that. Click the button below, and add the gadget. Head to Theme => Customize => Background Select a background, apply, view the blog. NOTE: Changes won't show up in the Template designer/customizer, but hitting apply will set the background! The gadget contains the following custom markup. <b:includable id='main'> <style> /* Hide this gadget. */ #<data:widget.instanceId /> { display: none; } </style> <b:if cond='data:skin.vars.body_background.image'> <b:include name='responsiveImageStyle' cond='not data:view.isPreview' data='{ image: data:skin.vars.body_background.image, ...

Add Disqus comments to my blog

Some users prefer the Disqus commenting platform over the Blogger-native one, or its integrated G+ comments. Disqus should be installed as an HTML gadget using their  Blogger installer ! Doing so achieves the same result as this article, only more smoothly, since the Disqus short-name is automatically populated for you! However, it can also be installed by clicking the button below, if you've got the short-name handy. If you don't, follow the link above and fetch it. The HTML gadget provided here is just a small tweak to the  manual instructions  on the Disqus website - namely, it ensures that the div containing the contents isn't rendered (which sometimes results in extra dividers, etc). Content of the HTML gadget is: <script> var disqus_shortname = 'EXAMPLE'; </script> And the custom markup for the HTML gadget is: <b:includable id='main'> <b:include name='super.main' /> <script type='text/...

Add a parallax effect to Contempo

Blogger's just launched a bunch of new templates, one of which, Contempo, I'm currently rocking myself! If you scroll a little, you'll notice that I've got a subtle parallax effect going. That effect is just a small JS library by Mark Dalgleish , called Stellar. To add the parallax effect to your own Contempo template, just click this button! The content is shown below. If you're using Soho, the parallax effect can be added  in the Soho-equivalent article ! Alternatively, you can simply head to your blog's Layout  tab, and add an HTML/Javascript gadget anywhere in the page. Then, add the following content to it: <script src="https://ajax.googleapis.com/ajax/libs/jquery/1.11.0/jquery.min.js"></script> <script src='https://cdn.rawgit.com/markdalgleish/stellar.js/master/jquery.stellar.min.js'></script> <script> $('.bg-photo').attr('data-stellar-background-ratio', '0.5'); $(wind...

Make my background image responsive

Image
Blogger's got a nice selection of backgrounds to choose from when you're customizing your template. Recently, they made some changes to make them responsive. If you don't know what I mean by responsive, try reducing the size of your browser window, and you'll see the background of this blog re-requested as a smaller version of the background image). This actually has a massive impact on bandwidth for your readers. Take, for example, the background of this blog: Full size (370KB) 1600 wide (319KB) - 13% smaller 1200 wide (236KB) - 36% smaller 800 wide (186KB) - 50% smaller 640 wide (139KB) - 62% smaller 480 wide (65KB) - 82% smaller! For anyone who has forked (customized) their template, though, the change may not been applied. If you've customized your template, using 'Edit HTML' on the template tab, but are still using the Blogger backgrounds, you should also add the following HTML gadget to your template. The gadget contain...

Get Facebook to show feature image for your Blog's Homepage

Image
Facebook seemingly exclusively uses  Open Graph protocol  ( og:image )  tags to determine which image to feature. As a result, sharing your content to Facebook from blogspot has no image or a broken image for the homepage. To fix this, you can explicitly specify the feature image on feed pages. Select your image, and copy the URL Go to  Template => Edit HTML Search for the 'all-head-content' tag Underneath that tag,  add the following XML, replacing [Your image URL]  with the URL of the image you want to feature. Note: Make sure to leave the single AND double quote-marks wrapping the URL. <b:if cond='data:view.isMultipleItems'> <b:with var='image' value='"[Your image URL]"'> <meta property='og:image' expr:content='resizeImage(data:image, 1200, "1200:630")' /> </b:with> </b:if> Resizing the Feature Image If the image you have uploaded is host...

Get nicer thumbnails for my Post snippets

I recently received some feedback that my thumbnails are a bit nicer than the standard thumbnails offered by Blogger. This is because I use a custom snippet in my Blog widget, to produce bigger thumbnails, using the new resizeImage operator . Note: This post leverages the techniques described in the article about  Responsive images for Google photos . A note: The resizing behaviour provided on Blogger requires that the image is hosted on a Google platform to work - provided that you add your images by uploading them in the editor, this technique should work. Creating a responsive, resized Thumbnail The resize operator takes 3 parameters - the URL of the image, the width to resize it to, and an optional ratio for a cropped version of the image. <img expr:src=’resizeImage(data:post.firstImageUrl, 300)’ /> In my Blog widget, I've customized the HTML so that on feed views (homepage, search, etc), I display post snippets instead of the full post. As a part of thes...

Prevent search crawlers indexing my Archive pages

If your blog archive only has one post for a given page, say 'March 2016', then the content overlap for that post is very high when comparing the blog archive page to the actual post page. This can lead to the archive and the post both showing as results when you run a search. To prevent this happening, you can add a meta tag to your template. Go to Template => Edit HTML Search for 'all-head-content' Add the following underneath  the tag for all-head-content  <b:if cond='data:blog.pageType == "archive"                 or data:blog.searchQuery != ""                 or data:blog.searchLabel != "" '>     <meta name="robots" content="noindex" />   </b:if> This will cause the noindex meta tag to be rendered on archive and search pages, preventing duplicate results for the content in your post. Happy Blogging!

Change the colours of the Polls Widget

Image
For some reason, the polls widget does not have settings for its colours in the configuration dialog. It seems to pick up its colors from template variables instead. Find or Add the variables The variable that the polls widget uses for its text color is sidebar.text.color - if this variable already exists in your skin, you will find it in the group that it belongs to. If it doesn't already exist, add it by copying this into the <b:skin>  section of your blog's template ( Template => Edit HTML).   <Group description="Poll Widget" selector="widget.Poll">      <Variable name="sidebar.text.color" description="Text Color" type="color" default="#2288bb"  value="#2288bb"/>      <Variable name="sidebar.link.color" description="Link Color" type="color" default="#2288bb"  value="#2288bb"/>    </Group> Add new variables if ...

Make post title hyperlinks colour the same as the title colour

Image
In the template designer, some templates have a different colour for hyperlinks than for the title. We can re-use the same variable value in order to override the hyperlink colours with the post title colour. Note: This example is done for the  Simple  template. CSS variables and definitions may be quite different in other templates, but the same concepts apply. Change the Skin CSS Skin CSS can be found when editing your template's HTML, under Template => Edit HTML. The skin for a template is near the top, in the <head> element. Add a variable for post.title.color Find the variable group relating to the class of the post titles - for example, in 'Simple' templates, the variable group has description="Post Title". Add the new variable. <Group description="Post Title" selector="h3.post-title, .comments h4"> <Variable name="post.title.font" description="Font" type="font"...

Filter out certain labels from my Blog Homepage

Image
Sometimes, you want to be able to filter your posts on the homepage. Maybe you want to use the label "Home" to be the only posts that show on the homepage, or maybe you don't want to show your "Cooking" and "Dancing" posts on the home page. Here's how you can filter by label. Notes:  This does not require any javascript! This  does not apply to Dynamic Views templates. This will look funny if you have posts grouped by date, as there will be dates with no posts. WARNING: This method will filter blogs of a certain label out of a list of all the posts that were loaded. So, if you only load the first 7 posts in your feed, and then filter to "Home" posts, you're going to only see the posts out of the first 7  which have the label Home. You can, of course, increase the number of posts shown in the home-page , but do so with the knowledge it could slow the homepage on your blog down! Filtering to Posts with a specific Label ...

Change the width of the Sidebar in Dynamic Views

Image
The default width of the sidebar truncates longer post titles, so it's good to be able to increase the size. Change the width custom CSS Custom CSS can be added to your blog under Template  => Customise => Advanced => Add CSS. Dialog for adding custom CSS to your blog In this dialog, add the following styles. .sidebar #sidebar { width: 380px; } .sidebar #content { margin-left: 380px; } Custom CSS for making the Dynamic Views sidebar wider. Adjust the value to the size you want. Happy Blogging!